3 posts tagged with "Blockly"

View All Tags

· 4 min read

Scratch3 擴充套件開發

最近應 s4a 社群許老師的邀請,在業餘時間研究了一下 Scratch 3,看看能做點什麼貢獻。

Scratch 3 是一套由麻省理工學院(MIT)發起,以兒童學習程式為目的所設計的視覺化編程軟體。Scratch 3 可使用堆疊積木塊的方式,來完成一般程式語言能完成的事情。

Scratch 3 除了程式語言的部分採用堆疊積木塊的方式,還提供了對應的整合的舞台,主角,並提供相對應的積木塊。你可以透過拖拉積木塊,直接控制這些主角在場景中的活動。

Scratch 3 的積木編程部分和我多年前玩過1Blockly 很相似。實際上 Blockly / AppInventor 的靈感來源就是來自於 Scratch。

在 Scratch 3 版本中,也已經將 Blockly 整合進去,作為它提供程式積木的方式。

我做了 JSON 抓取資料並解析,和空污 LASS 的擴充套件。透過這些積木,學生可以從網路上抓取最新的空氣污染狀況,然後用 Scratch 3 上場景可愛的人物口中說出來,或是視覺化的顯示結果。

例如透過 JSON 積木,連線到http://ifconfig.me/all.json取得對外的 IP

Imgur

或是透過填入設備代號,連到任一 LASS 設備,取得當地 PM2.5,溫度等資訊

Imgur

由於 Scratch 3 尚未完成第三方擴充套件的分享架構,因此這兩個擴充套件都放在 scratch3-internet2 專案中,想嘗試的人也可以直接連到3使用。

scratch3-internet2 專案的特色,是簡化了擴充套件開發前的設定工作,並很容易部署到 Github 網頁上。

技術上,scratch3-internet2 專案用了 git submodule 來抓取 Scratch 3 的相關專案,並透過 patch 的方式將自行開發的擴充套件加入其中,最後包裝成自己的版本3。透過這種方式最小化維護成本。

擴充套件需修改的部分如下(可在2中找到更詳細的文件):

graph TD Scratch3 --- |UI| GUI Scratch3 -.- |Blockly| blocks Scratch3 --- |core parser| VM VM --> src/extensions subgraph Extensions src/extensions -.- json[JSON blocks] src/extensions -.- lass[LASS blocks] end GUI --- |Define extension cards| x[src/lib/libraries/extensions/index.jsx] subgraph Extension Cards x -.- j[JSON card] x -.- l[LASS card] end

要啟動一個適合擴充套件開發的 scratch3 專案,只要照以下步驟即可:

  1. fork scratch3-internet 專案
  2. clonse repo git clone https://github.com/[your name]/scratch3-internet.git
  3. get and setup related projects npm run setup
  4. start the development server npm run start

要部署到自己的 Github 專案網頁,只需

  1. 編譯網站,npm run build,編譯好的檔案在 scratch-gui/build
  2. 部署到 Github 專案網站的 gh-pages 分支中 npm run deploy,即可透過 https://[yourname].github.io 存取。

參考資料

· One min read

After a month of sprint, BlocklyDuino is open sourced and hosted on GitHub.

Now it bounds more blocks and have some valid features:

  1. Programming Arduino with visually drag and drop code blocks.
  2. Generate fully compatible arduino source code.
  3. Interacive Arduino board with 10+ predefined Grove sensor blocks.
  4. Load different on-site examples with url parameters.

When you click the 'Arduino' tab, the mouse will auto-focused to the code area, that means you can use keyboard to select then copy the source to Arduino IDE.

And now it even support procedures (functions).

BlocklyDuino Google+ page has been created and will update more frequently then here for new features.

· 2 min read

Direct link to Blocklyduino : http://www.gasolin.idv.tw/public/blockly/demos/blocklyduino/index.html

Blockly is a web-based, graphical programming editor. Users can drag blocks together to build an application. 

Arduino is an electronics prototyping platform based on flexible, easy-to-use hardware and software.

Grove "GROVE_-_Starter_Bundle_V1.0b#LED_Twig" is a modular, safe and easy to use group of items that allow you to minimise the effort required to get started with microcontroller-based experimentation and learning.

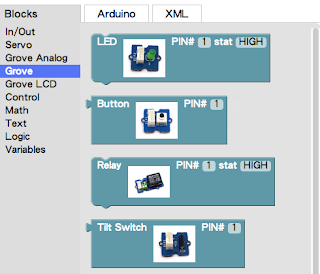
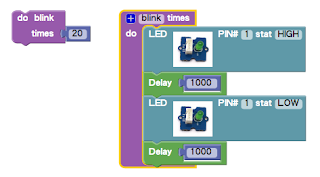
With recent blockly update, we can make image blocks in blockly, and its pretty easy to make blocks with blockfactory. I feel it's natural to see the real hardware image while program the arduino firmware. So here is my experimental attempt called Blocklyduino.

Besides the basic arduino language functions, I choose Grove blocks to make Blocklyduino fit for non-electronic/wiring-experience people.

Here's the very early version of examples written by Blocklyduino. which should generate the same code that is correspondent to examples on grove wiki.

Digital Input example

image from grove wiki

code written by Blocklyduino Analog Input example

image from grove wiki

code written by Blocklyduino

Blocklyduino

will output the arduino source

code with setup/loop blocks as usual arduino  source code.

To upload those code to the real hardware and see how it works, you need to get a standard Arduino Uno/Duemilanove board, and a set of Grove starter-kit (optional for grove blocks).

Currently Support:  (10/6 updated)

  • arduino functions:

  • compact Digital/Analog Read/Write syntax

  • auto setup pinMode

  • delay and map

  • block

  • Grove blocks: LED, Potentiometer, Tilt switch,

Currently Lack of:

  • Variables support
  • Have to copy-n-paste source to arduino IDE to upload to board